Upgrading your PC’s graphics card is an effective way to boost gaming and computing performance. This comprehensive guide will walk you through the entire process of changing your graphic card safely and correctly. From identifying components and choosing a new card to uninstalling the old driver and installing the new one, here are the step-by-step instructions.
Ever wonder how to swap out your aging graphics card for a newer, more powerful model? This article teaches you everything needed to perform a graphic card upgrade yourself with ease. Follow our detailed guidelines covering part selection, removal, installation, and setup to optimize your PC gaming experience.
We’ll explain how to properly prepare your system, remove the old card, install the new one, and troubleshoot any issues. Learn about important safety precautions, driver management, hardware specifications, and more. By the end, you’ll be an expert at upgrading your card like a pro PC technician. Let’s get started!
Check System Requirements and Choose a New Card

The first step is verifying your power supply and computer case can support a new graphics card. Check the recommended and minimum power supply wattage for the cards you’re considering. You’ll also need available PCIe slots and adequate clearance inside the case. Research cards that suit your monitor resolution, preferred games, and budget too.
Reputable brands like Asus, MSI graphics cards, EVGA, and Gigforce deliver quality and drivers. MSI is a top manufacturer known for reliable graphics cards. Check online reviews comparing specs like cores, memory types, and ports. Consider future-proofing with Ray Tracing or VR capabilities if desired. Purchase from verified sellers for warranty coverage.
Prepare for Installation
For a smooth upgrade, shut down and unplug your PC first. Next, discharge any static electricity by touching a metal case vent before handling components. Have a clean workspace ready along with needed tools like a Phillips head screwdriver. Download and save the latest drivers for the new card to install later.
Remove side panels to access the motherboard. It’s a good idea to fully dust inside with compressed air too. Note where cables are plugged for reconnecting later. Take photos if the wiring is confusing. With safety precautions and workspace prepared, you’re set to uninstall the existing graphics card.
Discharge Static Electricity
Touching metal parts like a case screw grounds any static built up on your body to avoid damaging sensitive computer components. Discharge between steps too by re-grounding yourself. This simple habit protects investment parts from voltage surges during the upgrade process.
Remove Side Panels
Loosen screws securing computer case side panels and slide them off for unrestricted access inside. Set screws and panels aside together to keep track of during reassembly.
Use Compressed Air to Dust
Blowing compressed air removes dust buildup from heatsinks and fans. Cleanliness ensures optimal airflow and component cooling performance after installation.
Remove Existing Graphics Card
Locate the graphics card by finding its distinctive shape and ports. Gently twist and remove any screws securing it. Make a note of which PCIe slot the card occupies. Use a label if needed. Next, disconnect any auxiliary power cables connected to the card by squeezing plastic clips and pulling cables straight away. Finally, press the clip at the end of the card and carefully lift it from the motherboard slot until fully extended. Set the old card safely aside. Double-check all video ports and that no cables remain dangling inside the case. Your motherboard slot is now empty, ready for the new card.
Remove Any Screws Securing Card
Twist counter-clockwise and remove mounting screws found at either end of full-size cards or along the bracket on smaller models. Keep hardware for future use.
Disconnect Auxiliary Power Cables
These supply extra power from the power supply. Gently press plastic clips while firmly pulling each cable end from its respective port on the card. Avoid jagged movements.
Remove the Card from the Slot
Press the retention clip lever at the end of the card outward away from the motherboard until the card can be lifted straight up from its slot without resistance. Move carefully to avoid bending pins inside the slot.
Install New Graphics Card
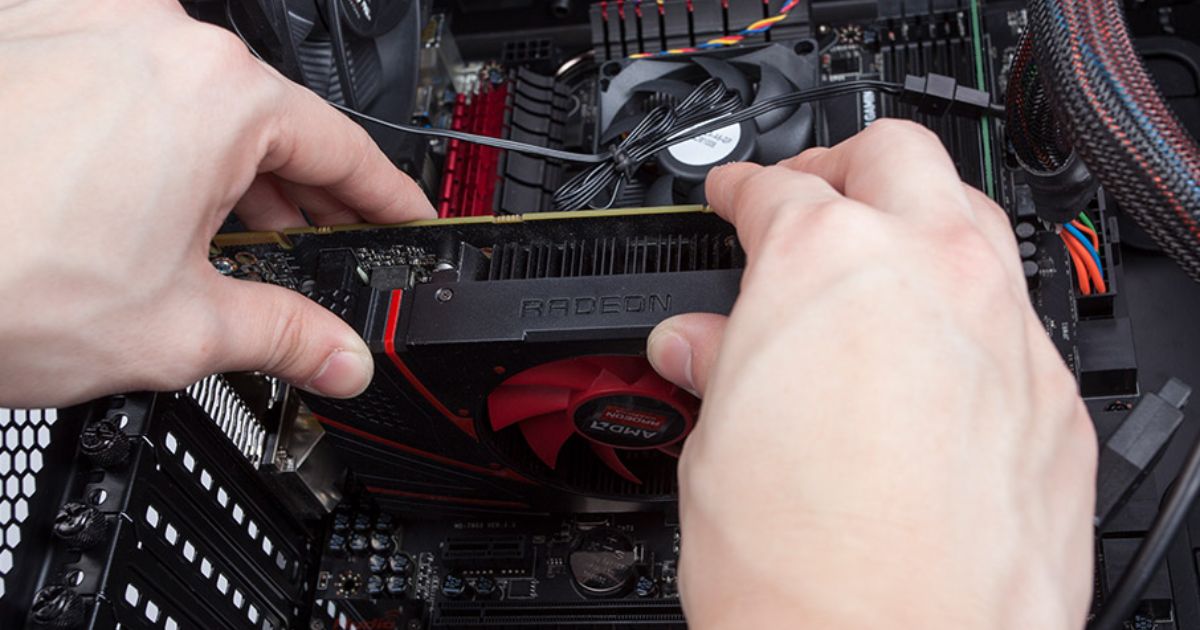
Begin by removing any protective covering from the new card’s components or ports. Hold the card by its edges only and align its gold contacts with your motherboard’s PCIe slot. Push down firmly and evenly until it clicks fully into place. Screw the mounting bracket into position at the back of the case using supplied screws or saved ones.
Next, plug in any necessary auxiliary power cables from your power supply by matching 6 or 8-pin port shapes and pushing straight in until clicking. Finally, replace the side panels and screws so the case secures the heavy card safely. Rejoin any peripherals like a monitor before installing drivers for functionality with your new graphics card hardware.
Remove Protective Coverings
Peel plastic film off graphics card components and ports for heat dissipation and functionality. Be careful not to touch chips or ports with bare hands.
Insert Card into PCIe Slot
Align notches and push straight down firmly until it clicks flush against the motherboard. Do not force if resistance is met. The card should sit completely level.
Attach Power and Peripherals
Reconnect auxiliary power, replace case side panels then plug in any previously detached monitors, keyboards, or other peripherals to port locations on the new graphics card.
Install Graphics Card Drivers
You’re almost done! First, reboot your PC for initial card detection. Open the driver installer you downloaded and backed up earlier, usually named for your card manufacturer. Select language, agree to terms, and choose a custom/advanced installation over express. Under components, check only Graphics before installing. Reboot again once complete.
Sign in to accounts like GeForce Experience or Radeon Software for customizable monitoring, games library, and optimizations. Consider overclocking for performance tweaks if desired but research safely first as heat output increases. Check that games, programs, and resolutions are utilizing the new card as expected through appropriate settings or task manager verification.
Reboot and Install Drivers
Reboot your PC for it to detect the fresh hardware. Run the installer executable file while connected to the internet. Follow on-screen prompts, agree to terms, and choose advanced installation for full functionality and control.
Sign into Software and Optimize
Sign into any manufacturer software portal like GeForce Experience. Scan installed games to optimize settings. Monitor temps, overclock safely, and access exclusive extras to take full advantage of your upgraded card’s potential through expert-level optimization tools.
Troubleshoot Any Issues

If your system doesn’t display anything or behave as expected after the upgrade, stay calm. First, reseat all power cables and ensure a tight connection to the PSU and card. Recheck that the card sits fully locked into the PCIe slot without hanging over the edges or obstructing other components. Attempt reinstalling drivers again or rolling back to previous versions if needed through safe removal in the device manager.
Check that the recommended power supply wattage exceeds requirements and that all case fans spin properly. Continued problems might point to faulty hardware; politely ask the retailer about returns or replacements under warranty for verified defects. With patience and methodical steps, you’ll narrow the cause of any troubles quickly.
Reseat Connections
If issues occur, begin troubleshooting by removing and reconnecting all power cables firmly into the power supply units and the card itself. Ensure tight, full contact without gaps that could cause intermittent power troubles.
Reinstall or Rollback Drivers
If reseating fails, uninstall existing graphics drivers through safe removal in Windows Device Manager before reinstalling the latest version. Consider rolling back to previous drivers released as a temporary alternative fix as well.
FAQ’s
Can my PC handle a new graphics card?
Check that your power supply provides sufficient wattage and that your motherboard/case has available PCIe slots. You’ll also need adequate power connectors.
How do I choose a replacement graphics card?
Consider your monitor, games/programs, budget, and PC specs. Compare cards’ specs like memory, ports, and reviews to pick a model that matches your needs.
Are graphics cards easy to replace?
With the right precautions and following instructions, yes it’s a straightforward process within most PCs. Just focus on safety steps and driver management.
Can I just swap out graphics cards?
Yes, as long as your new card meets system requirements. Remove the old one, and install the replacement and drivers. Pay attention to cable/slot placements for smooth swapping between cards.
Conclusion
With the right precautions and procedures, anyone can successfully upgrade their desktop’s graphics card. By selecting the most suitable new model, preparing properly, safely removing the old card, and installing the replacement with care, your system is set for enhanced performance. Don’t forget to install the latest optimized drivers too. With practice, the whole process becomes second nature. Your PC will run cooler, quieter, and stronger with an upgraded graphics solution at its core. Enjoy maximized gaming experiences and productivity tasks for years to come.